How to Make a Granny Square Cardigan (2 Easy Methods)
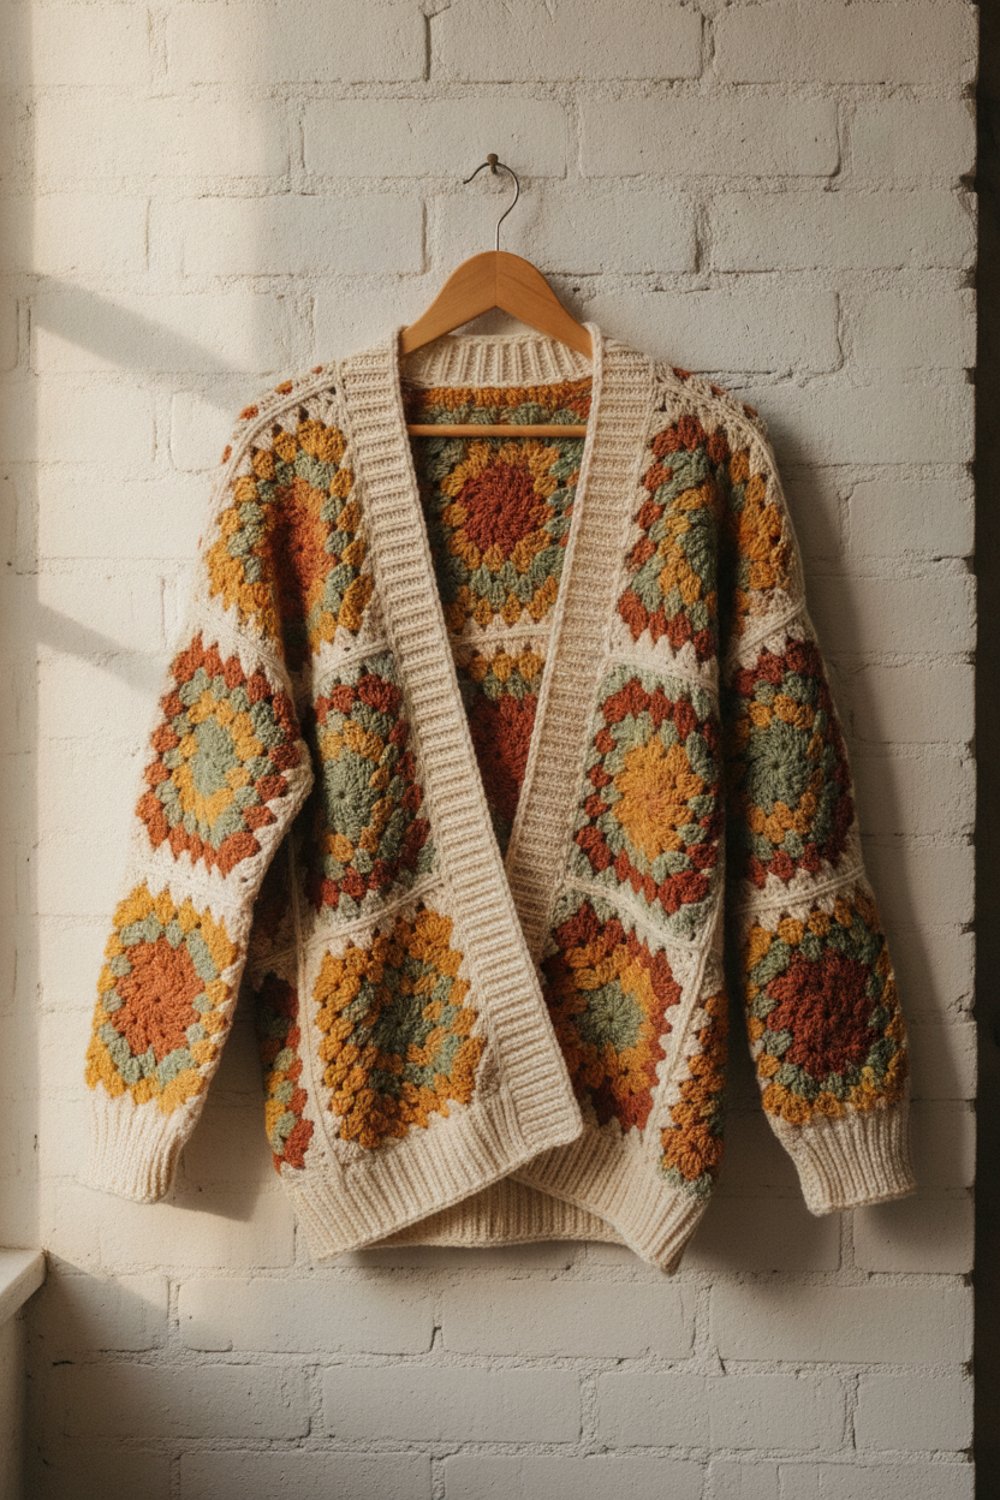
Granny square cardigans are everywhere right now, and for good reason. They are colorful, cozy, and a great way to use up leftover yarn. Best of all, if you can make one granny square, you already know the main stitch.
In this guide you will learn the two most common ways to make one. The first uses lots of small squares sewn together. The second uses one giant granny square folded into a cocoon shape. We cover yarn, layout, joining, edging, and the mistakes that trip people up, plus free patterns for each method.
What You’ll Need
- Worsted weight (#4) yarn in a main color plus 3–5 contrast colors
- A crochet hook to match your yarn, often 5.5 mm (I) to 6.5 mm (K) for worsted
- Locking stitch markers
- Yarn needle for joining and weaving ends
- Scissors
- Blocking board or foam mats with pins
- Small zip bags to keep finished squares sorted (optional)
Method 1 vs. Method 2
| Small squares | One giant square | |
|---|---|---|
| Look | Classic patchwork, lots of color | Smooth, drapey shrug or cocoon |
| Sewing | Many seams to join | Only two short seams |
| Portability | Very portable, one square at a time | Gets big and heavy |
| Best for | Using scraps, custom colors | A fast first project |
Method 1: Small Granny Squares Joined Together
Step-by-step
Step 1: Pick your pattern and size first. The square size and number of squares change by size. In Joy of Motion Crochet’s free Granny Square Cardigan, for example, the XS/S size uses 38 squares of about 4.5 inches, and the larger sizes use 70 squares.
Step 2: Make one test square. Measure it after blocking. If it is bigger or smaller than the pattern says, change your hook size before you make the rest.
Step 3: Make all your squares. Weave in the ends as you go. You will thank yourself later.
Step 4: Block your squares so they are all the same size. Pin them to a mat, spray with water, and let them dry. Even squares are the secret to a neat cardigan.
Step 5: Lay out your squares on the floor or a bed, following your pattern’s layout. Take a photo so you remember the order.
Step 6: Join the squares. You can whip stitch them together with a yarn needle, use a flat slip stitch join, or join as you go on the last round. Join rows first, then join the rows to each other.
Step 7: Fold the joined piece at the shoulders and sew the side and sleeve seams.
Step 8: Add edging. Work a few rounds of single crochet or ribbing along the front edges, around the neck, along the bottom, and around the cuffs. This tidies the zigzag edges and gives the cardigan structure.
Free patterns for this method
- Granny Square Cardigan by Joy of Motion Crochet — rated Easy, worsted weight (#4), 5.5 mm or 6.5 mm hook depending on size, sizes XS to 5XL. The pattern suggests whip stitch, flat slip stitch, or join as you go.
- Granny Square Cardigan by MJ’s Off The Hook Designs — uses join-as-you-go, DK weight (#3), sizes XS to 5X. The video tutorial is free on YouTube; the written pattern unlocks with a free blog sign-up.
Method 2: One Giant Granny Square (Cocoon Cardigan)
This is the fastest way to a granny cardigan. You crochet one huge square, fold it, and sew two short seams. The openings become the armholes.
Step 1: Make a regular granny square and keep going, round after round, until it reaches the size your pattern gives. Two of Wands’ Movie Night Cocoon Cardi, for example, finishes at about 40 inches across.
Step 2: Lay the square flat like a diamond. Fold the left and right corners in toward the center.
Step 3: Sew a short seam on each side, leaving openings big enough for your arms.
Step 4: Add a few rounds of edging around the large opening. This becomes the collar and hem.
Free pattern for this method
- Movie Night Cocoon Cardi by Two of Wands — rated Easy, one size (you can add or remove rounds), US J-10 (6 mm) hook, about 1,116 yards of DK yarn. It is worked as one large granny square with double crochet clusters.
How Much Yarn Will You Need?
It depends on the size and your square size. Joy of Motion’s FAQ lists about 744–1,182 yards of the main color plus under 197 yards of each of five contrast colors. Two of Wands’ cocoon uses about 1,116 yards of DK yarn. If you are using scraps, make all your squares first, then buy the main joining color once you know how much is left to do.
Common Mistakes (and How to Fix Them)
- Squares are all different sizes. Fix: block every square to the same measurement before joining, and keep the same hook all the way through.
- Cardigan comes out too short. Fix: add one more row of squares at the hem, or add extra rounds of ribbing.
- Seams look bulky. Fix: join through the back loops only, or switch to a flat slip stitch join.
- Front edges flip outward. Fix: work a firmer edging with a smaller hook, or add one more round.
- Too many ends to weave in at the end. Fix: weave them in after each square, or crochet over the tails as you work.
Tips
- Pick one neutral color for the last round of every square. It ties random colors together.
- Lay out squares in daylight and take a photo in black and white to check the color balance.
- Use a stitch marker to mark the right side of each square.
- Try the cardigan on before you add the edging. You can still add squares.
- Store finished squares flat so they do not stretch.
- Cotton blends make a lighter spring cardigan. Wool blends make a warm fall one.
FAQ
How many granny squares do I need for a cardigan?
It depends on your size and square size. In one free pattern, Joy of Motion’s Granny Square Cardigan, the smallest sizes use 38 squares and the largest use 70. Bigger squares mean fewer pieces to join, so check your pattern’s layout before you start.
What size should my granny squares be?
Most cardigan patterns use squares between about 4 and 6 inches. Smaller squares give a more detailed patchwork look but take longer to join. The key is that every square is the same size, so block them all before joining.
Is a granny square cardigan good for beginners?
Yes, if you already know how to make a granny square. The stitches are simple. The new skills are joining and edging. The giant-square cocoon is the easiest place to start because it only needs two seams.
Make that first square today, and before long you will have a one-of-a-kind cardigan.